So you’ve just scoured your camera’s manual and sifted through the extensive menu system and alas, no built in intervalometer. That’s ok, an external timer remote for your camera is lot less expensive than you would think. Well, some of them are. That’s the purpose of this post. [aside]This post on Time-lapse Intervalometers: How to Choose the Right One is part of a larger road-map outlining timelapse photography called The Massive Time-lapse Photography How to Guide…[/aside]
I’ll layout some of the options that exist when looking for an external intervalometer for DSLR time-lapse photography. Specific reviews and how to guides for some of the different models as well as computer tethered software based options will be covered in subsequent posts.
The Goal: It’s about accurate and reliable automatic shutter triggering, and there are several ways to achieve this.
I have broken the external intervalometer world down into 6 segments.
- 3rd Party Manufacturers (Good: some are perfectly good and cheap)
- Name brands (Good, but more expensive)
- In Camera and Magic Lantern (Darn good, but some lack features and require DIY work) [writeup in the works]
- Advanced (Better: expensive but offer more features)
- Advanced Exposure Ramping (Best: The ultimate solution for day-to-night or night-to-day transitions) [writeup in the works]
- Home-built and DIY (Maker: Some are hard to make and lack features and field reliability, but they are just downright cool to come from your brain and hard work)
1. Off-brand Intervalometers and timer remotes
[aside]Just a quick note: *Pay close attention to your specific camera model for compatibility and read product reviews before you buy from a reputable source. View the master list of camera models and intervalometer cable types here[/aside] Several 3rd party manufactures produce great DSLR compatible intervalometers (some even having the same form factor as the name brands) and sell them at a fraction of the cost. This is good news for you and I.
Here are a few (and there are many others) that I might recommend to get the job done.
Linkdelight (ultra-cheap)
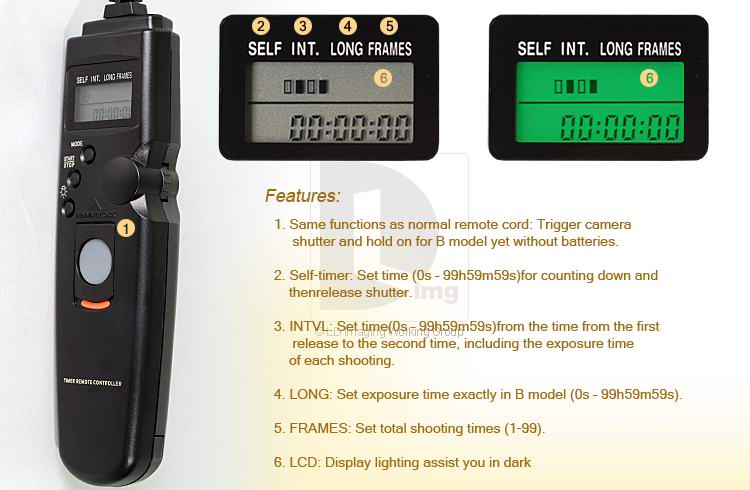
This inexpensive model is a good choice. It does what we need it to do and has all the features you need. I haven’t used this exact model yet, but many timelapsers at timescapes.org as well as people chiming in on the Linkdelight website cite a positive experience, an acceptable quality level and great time-lapse performance. Note: You can take unlimited shots with this model, just set the FRAMES to 0 (zero).
Cost: ~ $25
Where to read more reviews and get it: Linkdelight.com
Satechi (a little more but worth it)
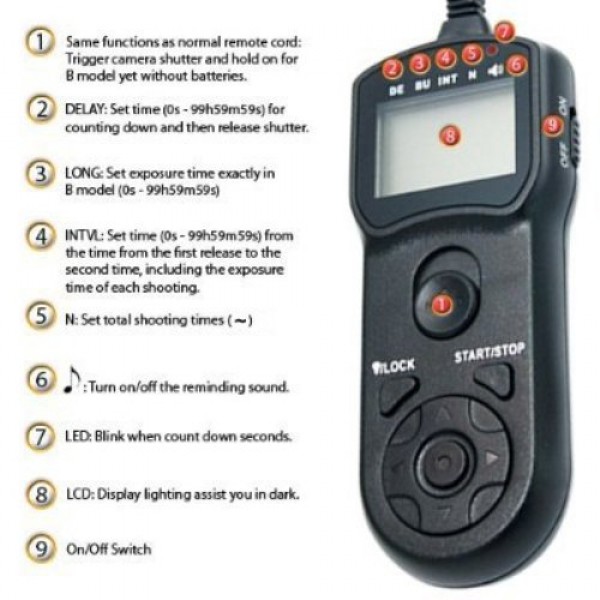
This is a slightly more expensive (but still around half the cost of name brand) option and is what I currently use. I am happy with the quality and functionality, with no problems to report. It has the same features as the above Linkdelight model plus the added ability to set shots between 1-399 and infinity (instead of 1-99 and infinity). If you are going to choose a budget model I’d recommend this one. It’s higher quality and takes normal AAA batteries.
Cost: ~ $60
Where to read more reviews and get it: Amazon
There are many others out there and I encourage you to look around. Take your time and make sure the specific camera model is listed as compatible and there are some good reviews to lean on before you buy. (have a different intervalometer that you’ve found to work great, or maybe not so great? Please add it to the comments below and i’ll try to update the post)
Vello ShutterBoss Timed Remote
Pearstone Shutterboss Timed Remote and the Wireless version
Aputure Intervalometer
2. Name Brand Intervalometers
I love name brand equipment, but the price…. ouch. With something relatively basic like an intervalometer you may want to save up any buy a professional/advanced one with extra features or buy 4 or 5 3rd party ones to have as backups: put one in the glove box, put one in your other camera bag, and put one in your back pocket. I jest, but my cat already chewed the wire and claimed my first Satechi (oops!). I don’t think he would have cared if it was name brand or not. As far as build quality and reliability, I would imagine (as I have not tested them) that these would be the best option. Here are a few examples:
Nikon and Canon Remote Timers
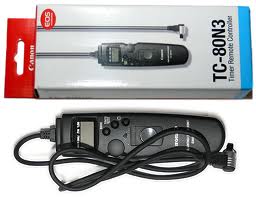
Canon Timer Remote Controller TC-80N3
Cost: ~ $168 from Canon
~ $129 from Amazon
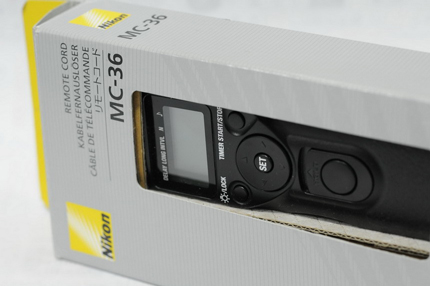
Nikon MC-36 Multi-Function Timer Remote
Cost: ~ $180 from Nikon
~ $67 from Amazon
Don’t forget to check ebay or craiglist too. You may be able to find some deals on used gear.
3. In-camera timelapse features and Magic Lantern
Writeup currently in the works. I am installing Magic Lantern on my Canon 7d and reviewing the built-in timelapse functionality of the Sony Alpha A7S.
4. Advanced Time-lapse Intervalometers
This is just a quick overview of some of the more advanced remote camera shutter control devices that are available commercially.
Realize there are constantly new innovations taking shape in this exciting field, with some being commercially available immediately while others being designed more for experimentation. Here are just a few implementations you might want to learn more about:
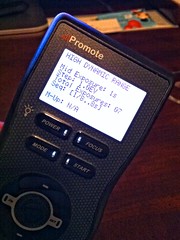
Promote HDR and timelapse controller
The Promote Control is marketed towards serious amateurs and pros (and for ~ $300 that’s probably about right). Mainly offering advanced HDR (High Dynamic Range) photographic options, the Promote does provides time-lapse functionality including Mirror-Up delay (an automatic wait for added photo sharpness) and HDR time-lapse multiple exposure options. Personally I would love to have this item but cannot justify the cost in the current budget.
Take a look at all the options and advanced features at the Promote Control website.
Trigger Trap smartphone timelapse controller
Learn more here
Review video and writeup currently in the works.
5. Advanced bulb and exposure ramping timelapse controllers
These controllers do more than just control the timing of shutter firing. Advanced exposure ramping controllers connect to your camera in multiple ways allowing the device to vary each exposure ever so slightly as the light changes in our environment. The super gradual change (much more gradual than our camera can do by itself) produces beautiful flicker free timelapse sequences when we are filming a day-to-night or night-to-day composition (aka: the timelapse holy grail).
Now there is more than one way to achieve those smooth transitions, both in camera at the time of exposure and in post production. We cover all the ways on this website and in the timelapse book.
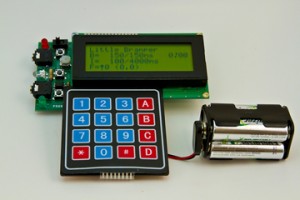
The Little Bramper (oh the classic original, no longer in production)
A standard intervalometer simply fires the camera shutter according to a set interval. The Little Bramper added an additional configuration and not only fires the cameras shutter but also varies the cameras exposure smoothly over time. By subtly varying the exposure, time-lapse footage of light varying scenes can be achieved. For example a brighter sunset (faster shutter speed and low ISO) might fade into a night scene (slower shutter speed and higher ISO).
I purchased a Little Bramper (pictured at left) and am learning the ropes now.
Head out to the Little Bramper website to learn more.
Cost: ~ $85 from Little Bramper
Timelapse+
Learn more here
Review video and writeup currently in the works.
Ramper Pro from Elysia Visuals
Learn more here
Review video and writeup currently in the works.
6. DIY Time-lapse Intervalometers
Time-lapse photography is not necessarily a new phenomena, although I think it’s fair to say that it is really gaining in popularity ever since DSLR cameras were introduced into the market. Ever since then people have been hacking and programming their own destructions (I mean constructions).
An obvious tickle to the computer engineer inside me, the do-it-yourself creations by others are extremely fun and exciting. I will be challenging myself in the future to tinker with a few of these designs, but right now take a look at what these master tinkerers have built.
- Intervalometer using a 555 timer IC @ Instructables
- TI graphing calculator based time-lapse intervalometer @ Instructables
- No power needed micro interval timer
- Hacking a wireless remote for your camera
- Using a Nintendo DS (This is phenomenal)
- And many many more….
What is your experience?
Have you found an time-lapse intervalometer that meets your needs?
Return to The Massive Time-lapse Photography Tutorial:
[includepost id=”177″][/includepost]

Thanks for the link – great site you’ve got here!
Don’t forget ‘Magic Lantern’ for us Canon EOS users – http://www.magiclantern.fm/ . I just discovered it and I’m planning to use it for my first time-lapse sequence.
Awesome site, I look forward to working my way through all your posts.
That is cool! No hardware to carry around as it runs from the SD card. Looks like there is a lot more than an intervalometer here!
Best of all it is open source so I can change it if I want.
Very impressive solution.
I frequently work with various types of plastics and feel that this design could be made with less effort in a non metal material.
For gluing plastics I use Vinyl Esther instead of Poly Esther.
Vinyl Esther is much more durable than Poly Esther.
Major problem with time lapse attachments is camera compatibility and this mechanical Intervalometer certainly solves that problem.
Simplicity always wins.
Thanks for sharing your design.
Just getting into time lapse photography using intervalometers, having a blast! Something I stumbled upon and am very happy I did is something called the CHDK for Canon cameras. If you have a Canon there is no need to buy an intervalometer at all, just install the CHDK and then you can upload intervalometer scripts and motion detection scripts to your camera…all for free. Check out how at this site http://www.intervalometer.org to see how you can unleash the power of your canon point and shoot camera and give it near DSLR capabilities…And by the way I am in no way a professional, just an inspired enthusiast..
i’m working last two years for a new generation Time Lapse, wireless remote camera project. Initially suitable for my Nikon D50.
We make a smart device attached via USB to the camera for more
control (beside we can use the simple shutter port. For example we can
change ISO, Aperture or Time Speed directly from our Open Source Android app via bluetooth connection. (We are planning in the future to use
Wi-FI)
Remote Shooter 3.0 is a smart device for Time Lapse and more, it
control wireless your digital camera from an Android APP, tablet or a
PC.
Shutter release can be triggered from a shake of the smartphone or
when a sound is detected from the phone mic, a text message and so on.
If could be interest, the links are:
Indiegogo fundraising pitch
http://igg.me/at/remshoot30
or http://pic-ap-board.blogspot.it/
Just an update…Provided you have an Android phone with USB OTG capabilities (to make the phone’s USB act as a host instead of a mere device), you can use apps such as Helicon Remote and DslrDashboard to use your phone as Intervalometer (among many other options). Your only purchase then gets reduced to an Android phone (i’m asuming you have one), and a 2$ USB OTG cable. The apps have a free version with some limits (RAW output only on paid version).
I’m an artist and I want to do time lapse videos of my work in progress. I am just getting into this area. I have a Fuji finepix S700. Which intervalometer can I get that will be compatible with this camera? Need help thank you..
Does anybody use an intervalometer with picture upload capability via 3G network? I think something like http://www.photocamcon.com
What kind of solution do you use?
Pepa
Check out photosentinel.com for great 3G-integrated time-lapse equipment. Fully weatherproof, remote configuration, receive every photo over 3G and power off just a small 10W solar panel for years.
my camera is a canon rebel T3i, the satechi time intervalometer is compatible with it?
Hello Glorielena,
Yes the Satechi model is compatible: http://www.amazon.com/gp/product/B001CCH2MO/ref=as_li_ss_tl?ie=UTF8&camp=1789&creative=390957&creativeASIN=B001CCH2MO&linkCode=as2&tag=spillbucke-20
thank you.
If can politely advertise my own interpretation of the intervalometer and motion, laser activated camera remote…
http://multifunctionremote.blogspot.com
Hi, I would like to build intervalormeter for Sony Nex-5R. I have a Sony timer and a simple infared remote. Kindly if anyone can advice how to identify which cable should be solder to which part of the circuit board. Thanks
[…] If your DSLR doesn't have this feature, then buy an intervalometer. This little machine connects to your camera, and you set it up to take photos at specific […]
[…] […]
[…] not, most cameras will be able to use a remote control that includes intervalometer function. Click here to view a bunch of different […]
[…] Posted by Ryan in Featured, Gear and reviews, How-to, Intervalometers, Select and understand your gear | 15 comments […]
[…] the full guide to choosing the right timelapse intervalometer or remote […]
[…] 3rd Party Manufacturers (Good: some are perfectly good and cheap) […]
[…] tuto techniku budete potřebovat nejlépe zrcadlovku s intervalometrem, nadstavbou firmwaru MagicLantern nebo možností ovládat foťák přes smartphone (třeba […]